mengenal seputar database server

بِسْــــــــــــــــمِ اﷲِالرَّحْمَنِ اارَّحِيم

Posted by Unknown Selasa, 27 September 2011 0 komentar
alternatif selain xampp,  dan masuk kategori bagus :
apache2triad
- sudah bundled dgn mysql, sqlite dan postgre,
jadi bisa lebih leluasa mau pakai db server yg mana buat belajar

pilihan antara mysql atau oracle,
sebenernya sih bagus oracle, cuma oracle mesti beli / bayar :D
kalau mau buat belajar dan bikin aplikasi yg tidak terlalu kompleks banget, mysql atau postgre masih bisa dipakai

-edit-
[ndak mau kalah mode : ON imageimageimage]
- Apache2Triad 1.5.4 -

Servers:
Apache (web server)
MySQL (database server)
PostgreSQL (database server)

XMail (e-mail server)
SlimFTPd (ftp server)

Interpreters:
PHP (scripting language)
Perl (scripting language)
Python (scripting language)

Graphic User Interfaces:
Apache2TriadCP (control panel)
phpMyAdmin (MySQL GUI)
phpPgAdmin (PostgreSQL GUI)
phpSQLiteAdmin (SQLite GUI)

AWStats (webserver monitor)
UebiMiau (E-mail client)
PHPXmail (XMail GUI)
PHPsFTPd (SlimFTPd GUI)

size apache2triad-nya : 98.057 KB

Baca Selengkapnya ....

apache_2.2.8-win32-x86-openssl-0.9.8g.msi

بِسْــــــــــــــــمِ اﷲِالرَّحْمَنِ اارَّحِيم

Posted by Unknown 0 komentar

  1. How to Set Up Apache with the Installation Wizard on Vista

    Follow the installer's instructions on setting up the web server (that is, read the information displayed in each dialog box, and click the necessary buttons). For the most part, installing is pretty straightforward. Don't worry, the not-so-straightforward portions are described in detail in the next few paragraphs.
    When you come to the "Server Information" window, enter "localhost" (without the quotation marks) in both the "Network Domain" and "Server Name" fields. In the "Administrator's Email Address" field, enter whatever email address you wish. In theory, this information is used by the installer to create a default configuration file for your web server. (In practice, the installer seems to ignore whatever you enter here. But you should still enter what I said earlier, just in case the installer has been fixed in the version you use.) You can easily modify this in your configuration file later if you change your mind.
    Leave the default option "for All Users, on Port 80, as a Service" as it is. When you're satisfied with what you've entered, click the "Next" button.
    When you're presented with the "Setup Type" screen, leave the default setting of "Typical" and click "Next". You'll be asked for the location to install Apache. Leave it at the default of "c:\Program Files\Apache Software Foundation\Apache 2.2\". I will assume that you've installed to this location in the rest of this article. Click "Next".
    When the "Ready to Install the Program" window appears, click the "Install" button. The setup utility will proceed to set up Apache on your machine.
    When the installer is done, click the "Finish" button to dismiss it. There should be no error messages or error windows. (If you get any errors, it probably means that you did not rigorously follow my procedure in this guide. To solve it, uninstall everything and start again.)
    Do not close the administrator command prompt window that you opened earlier. You'll need it again later.
  2. How to Start and Stop the Apache Service: Introducing The Apache Monitor

    Once you've finished all the above steps, you should be able to see a new icon in your system tray. This is the Apache Monitor. If you're not sure which icon in your tray is the Apache monitor, move your mouse button over each icon and wait for the tooltip to appear. The Apache Monitor should give a tooltip of "Running all Apache services" after you have successfully installed the program.
    Doubleclick the icon to open up the Apache Monitor program. A window, "Apache Service Monitor", will appear. This program allows you to start and stop the Apache web server on your machine. By default, the setup utility starts the Apache web server. If you want to the server to run only when you actually test your website on your computer, you can use the monitor to stop and start it.
    At the risk of stating the obvious, clicking the "Stop" button will stop the Apache web server service. The "Start" button starts it. If you make a change to the Apache configuration file (see later in this article), you will need to hit the "Restart" button to reload the Apache service, so that the server will reread the configuration file. When you're through playing with the buttons, click the "OK" button (not the "Exit" button) to return the Monitor to the system tray. If you have accidentally hit the "Exit" button and found that you've killed the Monitor, you can restart it again from your Start menu. (Type "monitor apache servers" in the Start menu search field.)
    If a button is disabled, it means that it's not relevant to the current situation. For example, if the Apache web server is already running, the "Start" button will be disabled. You can pretty much ignore the other buttons.
  3. Interim Test

    At this point, the Apache web server is fully functional. To make sure that the server is properly set up, start up your web browser, and go to the address "http://localhost/". If you see a simple web page with the words "It works!", it means that the server installation was successful.

How to Make the Apache Web Server Convenient to Use on Windows Vista

Even though Apache may now be properly installed on your system and running smoothly, in its current state, it is not convenient to configure or even copy your website files to it.
The problem is that the current Windows version of Apache 2.2 installer (version 2.2.10 at the time I wrote this article) was not really written with Vista in mind. As such, things that you frequently need to modify, like the configuration file and the web server files, are located in the "c:\Program Files\Apache Software Foundation\Apache 2.2\" folder. In Vista, the "Program Files" folder and its descendants are protected folders that programs can access only if they are run with administrator privileges (like we did earlier when we ran the Command Prompt as administrator).
If we leave things in this state, the only way that you can configure Apache is to run your editor as administrator. And when you need to copy your website's files to your local server, you'll need to do it when running as administrator. All in all, this makes things very troublesome for the web developer.
As such, until the Apache developers update the server to directly support Vista installations, you may want to do the following to make your life easier.
  1. Create a Folder for Your Apache Configuration and Website Files

    Create a new folder, either on your Desktop or in your Documents folder, called "apache". Actually, it doesn't matter where you create the folder or what you call it. However, for the purpose of this tutorial, I will assume that you created a new empty folder called "apache" on your desktop. That is, if your username is "heng", you will have a new folder called "c:\Users\heng\Desktop\apache".
    (To create a folder, right click your desktop and select "New" from the menu that appears, followed by the "Folder" item in the submenu. Rename the "New Folder" to "apache".)
    Open the folder by doubleclicking it. It should be empty. Leave the window open.
  2. Copy the Conf and Htdocs Folders to Your Private Apache Folder

    Click the start menu followed by the "Computer" item in the menu. This will open an Explorer window. Navigate to "c:\Program Files\Apache Software Foundation\Apache 2.2\" in the usual way you go to different folders on your computer. (That is, doubleclick the C: drive, then the "Program Files" folder, then the "Apache Software Foundation" folder, and finally the "Apache 2.2" folder).
    Look for the folder "conf". Right click the folder and select "Copy" from the menu that appears. Switch to the "apache" window that you opened in the previous step. Right click in the empty space in that window and select "Paste". Do the same for the "htdocs" folders as well. Do NOT drag and drop them. Copy and paste the folders or you will end up with folders and files having the wrong permissions.
    By the end of this step, you should have two copies of the "conf" and "htdocs" folders: one in your "Apache 2.2" Program Files folder, and one in your Desktop "apache" folder.
  3. Delete the Original Conf and Htdocs Folders

    Open the Apache Monitor by doubleclicking on its system tray icon. Click the "Stop" button to stop the service. When the service has stopped, you will see a message in the lower window "The Apache2.2 service has stopped". Click the "OK" button.
    Now switch back to the first window, the one pointing to "c:\Program Files\Apache Software Foundation\Apache 2.2\". Right click the "conf" folder and click "Delete" from the menu that appears. You will be asked to confirm in triplicate (I'm not kidding). That is, a dialog box will appear asking if you are sure that you want to move the folder to the Recycle Bin. Click "Yes" to the prompt that appears. Another dialog box, with the title "Destination Folder Access Denied" will open, asking you to confirm the operation. Click "Continue". Yet another window, the "User Account Control" will appear, again asking for your permission to continue. Click "Continue" again.
    Repeat the procedure with the "htdocs" folder.
  4. Create a Symbolic Link to Your Private Apache Folder

    Switch to the Administrator Command Prompt that you opened earlier.
    Type the following line into the "Administrator Command Prompt" window and hit the ENTER key.
    cd "c:\Program Files\Apache Software Foundation\Apache 2.2\"
    Be sure to type the opening and closing quotation marks (yes, the quotes are needed). The command will bring you into the Apache folder. To make sure you're in the right folder, type "dir" (without the quotes) followed by the ENTER key. You should see the same files and folders that you saw earlier in the Explorer window, albeit arranged in a different order.
    Type the following command, followed by the ENTER key. Notice that the command line includes characters like the quotation marks and the percent sign. All the characters are required.
    mklink /D conf "%USERPROFILE%\desktop\apache\conf"
    The shell (command prompt) will print reassuring words to the effect that a symbolic link has been created and where the link points to.
    If you make a mistake creating the symbolic link, so that it points to the wrong location, delete it by typing "rd conf" followed by the ENTER key. Then try again. Note that my above command line assumes that you have created a folder called "apache" on your desktop, as I mentioned earlier.
    Finally, create a symbolic link for the htdocs directory.
    mklink /D htdocs "%USERPROFILE%\desktop\apache\htdocs"
    To make sure that all is well, doubleclick the Apache Monitor icon again, and start the web server service. (That is, click the "Start" button in the Monitor window.) Then open your web browser and surf to "http://localhost/". The "It Works!" web page should appear. If "It Works" does not appear, and you get a directory listing of some other directory, it means that your "htdocs" link is pointing to the wrong location. Delete the existing link with "rd htdocs" in the Administrator Command Prompt and try again.

Using Apache on Vista: Basic Getting Started Guide

  • How to Publish Your Web Pages to Your Own Apache Server

    The "htdocs" subfolder that we created in your desktop "apache" folder is where all your web pages live. Since the folder directly resides on your computer, you don't have to do anything special to "publish" your website files. That is, you don't have to upload your pages using FTP or anything like that. (You can't anyway, unless you set up an FTP server in addition to your web server.) All you need to do is to copy your files to the "htdocs" folder and it will be displayed by Apache when there is a request for them.
  • How to Change the Server Name and Administrator's Email Address

    Remember how I mentioned earlier that if you change your mind about the email address you enter into the Apache setup utility or the domain name, you can change it later? For those who actually need to change these settings, you will have to modify the Apache configuration file, "httpd.conf". This file, if you have followed my procedure above, lives in the "conf" subfolder in your desktop "apache" folder.
    To edit it, either load it in Notepad directly, or invoke the Start menu, type "apache" into the "Start Search" box, and select the "Edit the Apache httpd.conf Configuration File" item that appears. This will invoke Notepad to load httpd.conf. Note that you should always use an ASCII or programmer's text editor to edit this file. Notepad is fine. But never use a word processor or office program. For example, any program that allows you to underline text, make things bold or italicize words should NOT be used.
    To change the server name, look for the following line and replace "localhost" with the domain you want.
    ServerName localhost:80
    If the "ServerName" entry is preceded by a hash ("#") sign, and there are no other "ServerName" entries in the file, remove the hash before you modify the line.
    To change the Administrator's email address, look for a line like the following (that is, starting with "ServerAdmin") and replace the email portion with whatever you want:
    ServerAdmin admin@localhost
    Once you're done with your changes, save the file by selecting the "Save" item from the "File" menu. Then invoke the Apache monitor and click the "Restart" button to restart the server.
    In general, if your purpose for setting up Apache is to test your site on your own machine before you upload it "live" onto a real web host, you don't have to change anything. For most people, the default settings are fine for such purposes.
    (As a side note, if you're thinking of buying your own domain name and attaching it to your web server, please note that your server, as currently set up, is not suitable for live deployment on the Internet. Live deployment requires additional security measures, not dealt with here. You will also need to have your domain point to your machine's real IP address in a name server.)
  • How to Configure Apache to Accept Server Side Includes

    If you want the web server to handle Server Side Includes (SSI), search for the text "server-side includes" in the configuration file. (If you skipped the previous item, and thus don't know how to load the Apache configuration file, please return to that section to find out how it is done.)
    The text you found should be in a section of lines all preceded by the hash ("#") sign. Any line that has a hash mark at the start is regarded as a comment by the Apache web server. Comments are ignored by the server, and are meant as explanatory text for human beings to read. They don't do anything except give information to human readers.
    Add the following lines immediately after that block of comments. The lines should be added ABOVE the closing </IfModule> line.
    AddType text/html .shtml
    AddOutputFilter INCLUDES .shtml
    
    If you look carefully at the commented text, you will notice that the configuration settings I provided above are mirrored exactly in the last two lines of the commented block. Instead of adding my lines, you can also uncomment those two lines in your file by removing the initial hash ("#") prefix before each line.
    When you do this, your Apache server will now be able to recognize files ending with the ".shtml" extension, and parse them for SSI directives.
    For those who want "index.shtml" to be your default start page for your directories, ie, if you want Apache to load "index.shtml" when you type "http://localhost" or "http://localhost/directory/", you will need to search for the following line in your "httpd.conf" file:
    DirectoryIndex index.html
    Replace that line with:
    DirectoryIndex index.shtml index.html
    This setting causes Apache to first look for an "index.shtml" file in the directory and use that as the default page for that directory. If this file cannot be found, it will look for the next file specified. That is, Apache goes through the list of filenames in the order given.
    When you're through with the configuration, save the file by clicking "Save" from the "File" menu. Again, you will have to invoke the Apache Monitor and click the "Restart" button to restart the server. This is needed because Apache only checks the configuration file once, when it loads. Any time you change the configuration file, you need to click the "Restart" button to make sure that Apache recognizes your new configuration.

How to Add PHP and Perl to Your Apache Web Server

Out of the box, Apache does not contain support for PHP or Perl. If you want your server to support PHP scripts, please see the article How to Install and Configure PHP 5 to Run with Apache on Windows.
I also have an older article How to Add Perl CGI Script Support to Your Apache Server on Windows that deals with adding Perl to Apache. That article was written for Apache 1.x, and is thus probably not very relevant to the 2.x series. I'll eventually get round to updating the article for Apache 2 on Vista, but in the meantime, if you're really stuck, it may provide some tips on what to look for when installing Perl.
(Note: If you want to be notified when these articles are updated or when new articles are published, please subscribe to thesitewizard.com's news feed. Instructions on how to do this can be found in my FAQ How to Subscribe to or Read News Feeds. Subscription is free, of course.)

Conclusion

Congratulations! You have now not only installed Apache 2.2.x successfully on Windows Vista, you've also configured it and made the overall use of Apache very much easier so that each time you modify its settings or update your website, you don't have to face multiple UAC prompts from Vista. And you didn't even have to permanently disable UAC (which, in spite of its detractors, has its uses) to accomplish it


http://www.thesitewizard.com/apache/install-apache-on-vista.shtml

Baca Selengkapnya ....

Instalasi Sever Web Apache2triad 1.5.4

بِسْــــــــــــــــمِ اﷲِالرَّحْمَنِ اارَّحِيم

Posted by Unknown Senin, 26 September 2011 0 komentar

Secara garis besar server web adalah sebuah aplikasi program yang mengirimkan isi dari data, contohnya adalah isi halaman web ini yakni dengan menggunakan HTTP ( Hyper Text Transfer Protocol ).

Untuk membuat sebuah sistem web baik yang sederhana maupun yang kompleks sekalipun di komputer pribadi tidaklah begitu sulit, cukup mudah kok. Yang kita butuhkan adalah server lokal ( disini penulis menggunakan Apache2triad ), web editor ( disini penulis menggunakan Macromedia dreamweaver CS3 ), dan browser ( disini penulis menggunakan Mozzila Firefox ).

Disini penulis akan coba bahas secara ringkas cara – cara peng install an web server Apache2triad 1.5.4.


Download Aplikasinya disini yaa..

Klik 2 kali pada file Apache2Triad1.5.4 seperti gambar diatas maka akan tampil jendela open file, klik ”Run” untuk install Apache2Triad1.5.4

Setelah anda klik tombol ”Run” seperti pada tampilan gambar diatas maka akan muncul jendela ”Verifiying Installer”

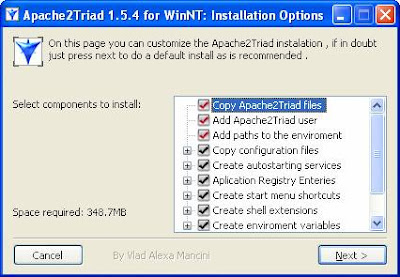
Selanjutnya akan muncul jendela ”Apache2Triad1.5.4 For WnNT: Installation Options”, langkah selanjutnya anda klik tombol ”Next”

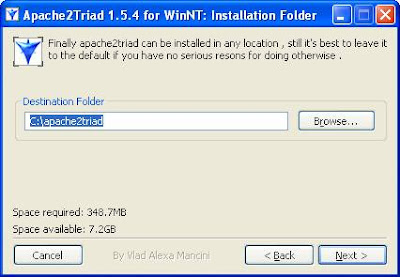
Selanjutnya akan muncul jendela ”Apache2Triad1.5.4 For WnNT: Installation Folder” yakni untuk menentukan lokasi file2 apache2triad akan diinstal ( default nya akan di install pada lokasi ( c:\apache2triad ), klik tombol ”Next”

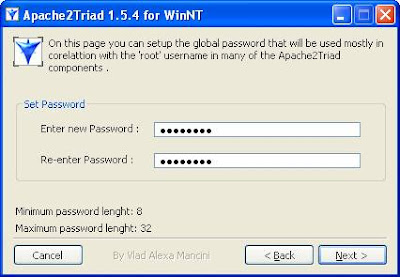
Selanjutnya akan muncul jendela input password, ketik ”password” untuk password nya, lalu klik tombol ”Next”

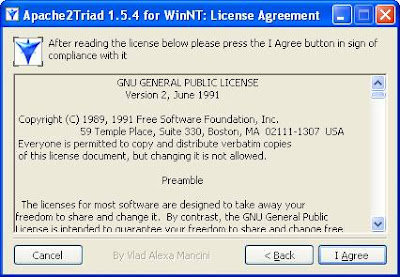
Selanjutnya akan muncul jendela ”Apache2Triad1.5.4 for WinNT: License Agreement”, klik tombol ”I Agree”

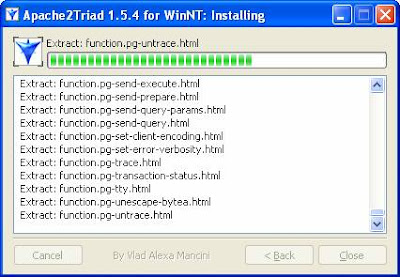
Berikutnya akan muncul jendela proses install, biarkan sampai proses install selesai

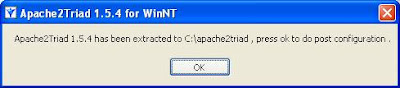
Apabila proses install telah selesai maka akan muncul jendela seperti berikut ini:

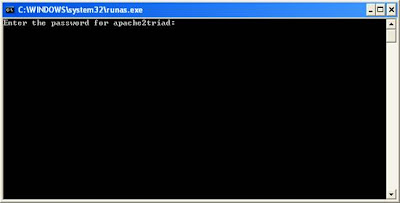
Berikutnya muncul jendela input password, kosongkan saja dengan cara menekan tombol enter

Proses install Apache2Triad1.5.4 telah selesai, klik tombol ”OK” untuk Reboot, Reboot fungsinya untuk menyempurnakan proses penginstallan


MEMAHAMI FOLDER APACHE2TRIAD
Folder Apache2Triad dapat anda temui pada direktori C:\apache2triad, jika anda tidak mengubahnya pada proses instalasi yang telah kita lakukan sebelumnya. Dengan menggunakan windows explorer, susunan folder hasil instalasi dapat dilihat sebagai berikut :
Tampak bahwa terdapat beberapa sub-folder yang berada di bawah folder utama apache2triad, untuk memahami setiap fungsinya, berikut penjelasannya :
  • Bin               : folder utama dari apache2 webserver.
  • Conf             : folder berisi file-file untuk konfigurasi apache2 webserver.
  • ftp                : folder berisi tools FTP (file transfer protocol).
  • Htdocs         : folder utama untuk menyimpan data data web yang telah kita buat, baik PHP maupun HTML biasa. Pada folder ini kita dapat menbuat subfolder sendiri untuk mengelompokkan file yang telah kita buat.
  • Manual         : folder yang didalamnya terdapat manual program dan database, termasuk manual PHP dan MySQL.
  • Mysql           : folder utama untuk database MySQL server. Didalamnya terdapat subfolder data untuk merekan semua nama database, serta subfolder bin yang berisi tools klien dan server MySQL.
  • Pgsql            : folder utama untuk database postgreSQL Server.
  • Perl               : folder utama untuk program Perl.
  • Php               : folder utama untuk program PHP.
  • Python          : folder utama untuk program python.
MENGAKSES CONTROL PANEL APACHE2TRIAD
Setelah Apache2Triad selesai diinstal, anda akan mendapatkan folder program didalam Start Menu. Unutk mengaksesnya, kita bias nengklik tombol Start – All Programs, biasanya terletak paling atas.
Apache2Triad sudah menyediakan tools berupa Control Panel berbentuk web yang berguna untuk mengontrol servis database MySQL. PostgreSQL an Apache2 web server. Anda dapat melakukan konfigurasi semua setting dengan tools ini. Nama tools-nya adalah Apache2Triad CP, dapat diakses melalui Start – All Programs – Apache2Triad – Apache2TrianCP.
Jika ada jendela konfirmasi yang meminta Otentikasi, ketikkan “root” untuk user name dan masukkan password yang telah kita buat pada step sebelumnya.
Kllik tombol ok untuk melanjutkan.
Jika password yang anda masukkan benar maka anda langsung dihadapkan dengan halaman utama Control Panel berbentuk web, seperti ini :
MENGKONFIGURASI SETTING
Dari halaman utama Control Panel, anda dapat mengatur setiap setting komponen program yang didukung Apache2Triad, termasuk mengatur setting Apache2 webserver dan MySQL. Caranya, buka halaman Control Panel. Perhatikan pada kotak bagian Servers, Anda akan mendapatkan kelompok pengaturan Apache seperti berikut :
MENJALANKAN SERVIS
Jika anda menginstal paket Apache2Triad secara penuh, maka beberapa servis penting seperti Apache2 dan MySQL secara otomatis sudah dijalankan saat start-up. Sebagai admin, anda dapat mematikan setting otomatis tersebut dan bias nmenghidupkan atau mematikan servis yang sudah berjalan dengan cara, buka halaman Control Panel. Di bagian paling bawah halaman ada kotak “services/prosesses ?
Dari gambar diatas, nama servis yang ber-checklist berarti aktif dan berjalan secara otomatis saat start-up windows.
Klik tombol stop jika ingin menghentikan proses salah satu servis.
MENCOBA KEBERHASILAN INSTALASI
Syarat utama agar anda dapat mengakses file PHP atau HTML yang telah anda buat adalah dukungan servis Apache2 webserver yang sudah berjalan. Setelah itu, maka anda dapat mengakses semua folder dan file program yang terletak pada C:\apache2triad\htdocs.
Caranya adalah, buka browser ketikkan alamat http://localhost/. Pada addess bar. Lalu tekan enter.
Jika berhasil maka tampilannya adalah seperti ini :
Demikian artikel ini saya buat berdasar dari buku karya Bunafit Nugroho, terbitan media kita. Semoga bermanfaat bagi kita semua.
Artikel lain yang terkait pembuatan website

Untuk si Vista,  masih harus mendownload apache_2.2.8-win32-x86-openssl-0.9.8g.msi dan menginstallnya ke foldernya si Apache2Triad yang tadi.
http://apache.the.net.id/httpd/binaries/win32/


archive.apache.org/dist/httpd/binaries/win32/
Go to www.apache.org and download "Win32 Binary (MSI Installer): apache_2.2.8-win32-x86-openssl-0.9.8g.msi to your desktop.
1. Double click "apache_2.2.8-win32-x86-openssl-0.9.8g.msi", and if prompted, click "run".
2. An installation wizard will appear.Click "Next".
3. The next page contains the terms of agreement. Select "I accept", and click "Next".
4. Read about the Apache Server, and click "Next"
5. The next screen will ask you for specific server information.Click "Next".
6. On the next screen, select "Typical Installation" and click "Next".
7. Click "Next".
8. Click "Install".
9. Open up Internet Explorer and type in "http://localhost". If you see a page that says "It works!" then the Apache server has been installed successfully.


Baca Selengkapnya ....

seting DREAMWAVER cs5 LOCALHOST

بِسْــــــــــــــــمِ اﷲِالرَّحْمَنِ اارَّحِيم

Posted by Unknown Kamis, 22 September 2011 0 komentar

Dreamweaver CS5 menyediakan settingan yang lebih mudah dalam membuat Site Definition. Berikut adalah langkah-langkah mudahnya:
  • Klik Site > New Site
  • Isi Site Name, dalam latihan ini Site Name diisi Websiteku.
  • Local site folder, silakan klik icon folder pada Local Site Folder dan buatlah folder baru di dalam folderC:\xampp\htdocs\ dengan nama folder Websiteku, sehingga akan munculC:\xampp\htdocs\Websiteku\. Klik Open > Select.
  • Klik Server pada list di sebelah kiri. Hal ini akan membuka panel dimana Anda dapat menyetting jenis pengetesan di Local Server ataupun Remote Server.
  • Klik tanda plus (+) untuk menambah Server baru guna pengetesan website dinamis yang akan kita buat.
  • Pada menu Basic, klik pada Connect Using: Local/Network
  • Untuk selanjutnya, gunakan settingan berikut ini:
  • Server Name: Websiteku
  • Connect using: Local/Network
  • Server Folder: ,klik icon folder untuk menemukan folder Websiteku yang tadi telah Anda buat atau dengan mengetikkan C:\xampp\htdocs\Websiteku (hal ini bisa berbeda tergantung dari setinggan computer Anda).
  • Web URL: http://localhost/Websiteku/ (hal ini juga bisa berbeda tergantung dari setinggan computer Anda). Hal ini member tahu Dreamweaver bahwa website Anda berada dalam document root dengan sub folder bernama Websiteku.
  • Klik tombol Advanced pada sisi atas dari panel, lalu dari pop-up menu, pilih PHP MySQL sebagai Server Model untuk pengetesan website Anda.
  • Pilih Save untuk menyimpan settingan dari website yang telah kita buat tadi. Secara default, Dreamweaver CS5 akan member tanda centang (check) pada Remote testing server.
  • Hilangkan tanda centang (uncheck) pada Remote tadi dan klik (beri tanda check) pada Testing. Hal ini sangat penting. http://localhost/ adalah local server tempat kita melakukan pengetesan atas website yang kita buat. Jika Anda menggunakan MAMPP dengan Operating System Mac, maka Anda harus menggunakan alamat localhost http://localhost:8888/Websiteku/. Penambahan 8888 adalah keharusan jika Anda menggunakan Apache dan MySQL secara default.
  • Klik Save. Dreamweaver CS5 secara otomatis akan menutup Site Setup Dialog dan akan segera membuat Site Cache. Anda dapat melihat site yang baru saja Anda buat telah tampil di File Anda.
  • Lakukan pengetesan di browser Anda dengan membuka http://localhost/Websiteku. Maka akan muncul tampilan kosong seperti ini. Hal ini terjadi karena kita belum membuat file sama sekali.

Baca Selengkapnya ....

DNS Server Alternatif All ISP

بِسْــــــــــــــــمِ اﷲِالرَّحْمَنِ اارَّحِيم

Posted by Unknown 0 komentar

DNS kepanjangan Domain Name Server. Fungsi DNS menerjemahkan namaDomain menjadi deretan angka IP. Contohnya bila kita akan membuka atau merequest url Domain tertentu, biasanya kita menggunakan deretan nama atau huruf karena lebih mudah dihafal seperti esc-creation.com, google.com, yahoo.com , Facebook.com dan sebagainya.
Nah disinilah DNS ini bekerja. DNS ini melakukan encode atau menerjemahkan dari domain google.com ke dalam bentuk deretan angka unik yaitu berupa IP misal google.com Ip nya adalah 208.67.219.231. Jadi bila kita masukan 208.67.219.231 pada browser maka juga akan membuka domain google.com tersebut. Deretan angka IP seperti 174.36.138.32. IP inilah yang digunakan mesin internet untuk saling berkomunikasi seperti Server DomainServer Hosting, Server Proxy dan sebagainya.
Terus apa hubungan DNS dengan kecepatan akses internet kita ?
Selain trik dan tips mempercepat akses internet pada postingan laluMenggunakan Proxy dan tweaking pada borwser. Kita juga bisa menggunakan DNS alternatif ini untuk mempercepat akses internet kita.
Pada dasarnya semua ISP (Internet Service Provider) atau penyedia layanan sambungan internet seperti indosat, Telkomsel, Telkom, dan sebagainya menggunakan atau mempunyai DNS Server tersendiri.Server DNS suatu ISP atau penyedia internet tentunya juga mempunyai kemampuan, kecepatan, speseifikasi, dan lama cache tersediri.
Adakalanya Server DNS ini Drop karena padatnya Trafik DNS server suatu ISP. Sehingga menyebabkan lambannya query atau proses request. Jadi bila terjadi gangguan pada Server DNS suatu ISP, maka pada saat kita akan membuka website menggunakan browser seperti mozila , Firefox, Opera, Flock, safari dan sebagainya, maka akan terasa lebih lambat bahkan terjadi konfirmasi error atau not Found pada browser kita. Seperti yang dulu sering terjadi di Telkom Speedy beberapa saat lalu.
Meski ISP atau penyedia Internet yang kita gunakan mempunyai Server DNS sendiri sebenarnya kita juga bisa menggunakan atau memanfaatkan DNS server ISP operator lain. Jadi Server DNS ini bisa kita gunakan untuk semua jenis ISP yang kita gunakan.
Cara merubah Setting DNS pada windows :
Control panel >>> Network Connections >>> Klik kanan account sambungan internet yang sedang aktif /connected >>> Properties >>> Networking >>>Internet Protocol >>> Properties >> Beri Tanda pada Use the Following DNS server addresses >>> masukan DNS yang anda pilih >> Klik Ok

Cara setting DNS pada windows
Mempercepat Akses Internet Menggunakan DNS alternatif

Restart Ulang Koneksi Internet anda , Perubahan akan terjadi setelah anda restart ulang koneksi internet anda.
Silahkan pilih alternatif DNS Server berikut ini, gunakan DNS yang anda rasa paling cepat pada sambungan internet anda.
Daftar Public DNS Server Indonesia :
Server DNS indosat.net.id termasuk DNS Indosat IM2
  • 202.155.0.10
  • 202.155.0.15
  • 202.155.0.20
  • 202.155.0.25
  • 202.155.46.66
  • 202.155.46.77
  • 202.155.30.227
DNS Telkom.net.id dan DNS Telkom Speedy
  • 202.134.0.155 : CacheDNS-JKT1.telkom.net.id (Jakarta)
  • 203.130.196.5 : CacheDNS-JKT2.telkom.net.id (Jakarta)
  • 203.130.196.155 : CacheDNS-JKT3.telkom.net.id (Jakarta)
  • 202.134.0.61 : CacheDNS-JKT4.telkom.net.id (Jakarta)
  • 125.160.2.226 : cachedns-tmk.telkom.net.id (Jakarta)
  • 202.134.1.10 : CacheDNS-SBY1.telkom.net.id (Surabaya)
  • 125.160.4.82 : CacheDNS-SBY2.telkom.net.id (Surabaya)
  • 61.94.192.12 : nsdpr1.telkom.net.id (Denpasar)
  • 125.160.2.34 : CacheDNS-DPS.telkom.net.id (Denpasar)
  • 125.160.2.162 : CacheDNS-MKS.telkom.net.id (Makasar)
  • 203.130.193.74 : CacheDNS-BTM.telkom.net.id (Batam)
  • 203.130.206.250 : CacheDNS-MDN.telkom.net.id (Medan)
  • 203.130.208.18 : CacheDNS-SMG.telkom.net.id (Semarang)
  • 203.130.209.242 : CacheDNS-BPP.telkom.net.id (Balik Papan)
  • 222.124.204.34 : CacheDNS-BDG.telkom.net.id (Bandung)
  • 202.134.0.62 : dns1.telkom.net.id
  • 222.124.18.62 : dns2.telkom.net.id
  • 203.130.196.6 : ns1.telkom.net.id
  • 203.130.193.75 : ns2.telkom.net.id
  • 202.134.1.5 : ns3.telkom.net.id
  • 202.134.1.7 : Telkom (Jakarta)
  • 125.160.14.189 : Telkom (Jakarta)
DNS Dirjen PostTel Indonesia 
  • 203.34.118.10
  • 203.34.118.12
DNS Nawala Awari dns
  • 180.131.144.144
  • 180.131.145.145
DNS PT Dwi Tunggal Putra Network Access Point
  • 202.43.160.50
  • 202.43.160.51
DNS PT Digital Wireless Indonesia ISP
  • 122.200.48.14
  • 122.200.48.15
DNS POWER TELECOM Jakarta
  • 203.190.55.210
  • 203.190.55.211
DNS sat.net.id
  • 202.149.82.25
  • 202.149.82.29
DNS XL Excelmindo
  • 202.152.254.245
  • 202.152.254.246
DNS cbn.net.id
  • 202.158.40.1
  • 202.158.20.1
  • 202.158.3.7
  • 202.158.3.6
DNS Idola .net
  • 202.152.5.36
  • 202.152.0.2
Singnet Singapore
  • 165.21.100.88
  • 165.21.83.88
DNS indo.net.id
  • 202.159.32.2
  • 202.159.33.2
DNS itb.ac.id
  • 202.249.24.65
  • 167.205.23.1
  • 167.205.22.123
  • 167.205.30.114
DNS ukdw.ac.id
  • 222.124.22.18
Daftar Public DNS Luar indonesia (International ):
DNS Open DNS
  • 208.67.222.222
  • 208.67.220.220
DNS Google
  • 8.8.8.8
  • 8.8.4.4
DNS ScrubIt
  • 67.138.54.100
  • 207.225.209.66
DNS DNSadvantage
  • 156.154.70.1
  • 156.154.71.1
DNS vnsc-pri.sys.gtei.net
  • 4.2.2.1
  • 4.2.2.2
  • 4.2.2.3
  • 4.2.2.4
  • 4.2.2.5
  • 4.2.2.6
Verizon (Reston, VA, US)
  • 151.197.0.38
  • 151.197.0.39
  • 151.202.0.84
  • 151.202.0.85
  • 151.202.0.85
  • 151.203.0.84
  • 151.203.0.85
  • 199.45.32.37
  • 199.45.32.38
  • 199.45.32.40
  • 199.45.32.43
GTE (Irving, TX, US)
  • 192.76.85.133
  • 206.124.64.1
One Connect IP (Albuquerque, NM, US)
  • 67.138.54.100
OpenDNS (San Francisco, CA, US)
  • 208.67.222.222
  • 208.67.220.220
Exetel (Sydney, AU)
  • 220.233.167.31
VRx Network Services (New York, NY, US)
  • 199.166.31.3
SpeakEasy (Seattle, WA, US)
  • 66.93.87.2
  • 216.231.41.2
  • 216.254.95.2
  • 64.81.45.2
  • 64.81.111.2
  • 64.81.127.2
  • 64.81.79.2
  • 64.81.159.2
  • 66.92.64.2
  • 66.92.224.2
  • 66.92.159.2
  • 64.81.79.2
  • 64.81.159.2
  • 64.81.127.2
  • 64.81.45.2
  • 216.27.175.2
  • 66.92.159.266.93.87.2
Sprintlink (Overland Park, KS, US)
  • 199.2.252.10
  • 204.97.212.10
  • 204.117.214.10
Cisco (San Jose, CA, US)
  • 64.102.255.44
  • 128.107.241.185


Baca Selengkapnya ....
Panduan blog dan SEO support Online Skill - Cinta fido Fido | Kopi kanan Akherat | Kisah Nabi Muhammad | Sahabat | Belajar Blogger | Template | HTML | Tutorial | Komputer.

investasi semoga anda senang

kurs mata uang BCA-2


Selamat datang di blog cinta fido, semoga anda diberi keSehatan oleh alloh SWT

Islam itu Cinta Damai Agama Islam Cinta Damai
jihad Damai adalah amal kebaikan yang Allah perintahkan dan menjadi sebab kokoh dan kemuliaan umat islam